Photography skills for Trainers
- Jan 29, 2013
- 4 min read

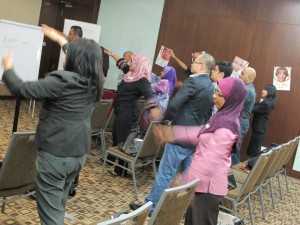
I’ve been doing events and operations for many years as a single unit. What I meant by single unit is, I travel alone most of the time and hosted tons of events alone without the assist of a crew. With that experience in hand, I have learned many useful skills which can be applied in what I do today in MWS. After a few years exposed in the training industry, I find that as a trainer, we need to capture the ‘moments’ during our workshop because that ‘moments’ we capture is the definition of our craft as a trainer. The action, smiley faces, laughs, jumps, etc.
Most professional trainers out there is competent to perform well and that’s all fine but when we browse over the pictures of the workshops, it doesn’t look as fun or exciting as the real workshop and that’s sad thing. The shots are dark, blur and doesn’t have any excitement which we experienced in the workshop. Imagine if we could browse through all the exciting and fun workshop pictures and sharing it with the participants. Isn’t that something different? Instead of just pointing and shooting in multiple shots ending up with dull and dark pictures.
Having said that, I have also encounter some trainers that is able to showcase their workshop in really nice and eye catching images, the pictures are able to transfer the excitement of the workshops into the images and that’s what we want! So today, I’m sharing some of my experience in photography and as a trainer in this article hopefully it can inspire all trainers out there to capture great images in your workshops.
Lets begin. So if you don’t have a crew to help you with great photography during your training, there’s nothing to worry about, you can do that yourself. All you need is to spend some time learning about your camera settings. Doesn’t matter if you have a point and shoot camera or DSLR, the settings are mostly the same which is white balance, iso, aperture, shutter speed, etc… Do not panic when you see these settings as it will help you get a great picture. The fastest way is to set it to ‘P‘ which stands for Program. Most digital camera comes with that setting. It means the camera will automatically adjust the right settings for you depending on the condition of the room so you only concentrate on the composition. Trust me, the camera is smarter and faster than we are! Let them do the thinking!
In order to get a great composition, we need to know a few basic rules which is:
1. Focal Point Lets look at the sample below:


Both images are trying to let us know something, which is the activities that is running in the workshop. Lets compare both images and see:
1. What is the central point of interest? 2. What will draw the eye of the viewers of this picture? 3. What in this image will make it stand out from others? 4. What is my subject?
If you know the answers to these questions, you are one step closer in knowing the Focal Point in an image which leads to a great composition. The reason a focal point is important is that when you look at an image your eye will generally need a ‘resting place’ or something of interest to really hold it. without it you’ll find people will simply glance at your shots and then move on the the next one. Focal point can be virtually anything ranging from a person, to a building, to a mountain or a flower etc. Obviously the more interesting the focal point the better it is.
2. Fill your frame
Lets look at the samples below:

Time and time again trainers are approached by participants to look at their photos and time and time again you will be amazed that people continue to take shots where you almost have to squint to make out their subjects because they are so distant. While empty spaces can be used effectively in photos to create stunning results (we’ll cover this in a future tip) you’re much more likely to get a ‘wow’ from those looking at your photos if your shots are filled with interest.
So how do you fill your frame? Its simple:
a) Use Zoom – most point and shoot digital cameras these days come with a zoom lens and all DSLRs are able to be fitted with one. Use them.
b) Use Your Legs – Most photographers have a built in zoom in the form of their legs.
Don’t just rely upon your cameras zoom but actually position yourself effectively for close in shots.
In summary, what we’re trying to achieve at the end of the day is to be able to get a couple of great shots and share it with the participants and keep it as a memory for the workshop. And when we browse the pictures again in the future, we are able to look at one image and have lots of things to say about it and that’s a great picture! Remember, always be creative and try something new! And the more you snap, the more you’ll learn!
We hope this article helps inspire you in your photography as a trainer! If you need more information, please do not hesitate to contact us at info@miniworkshopseries.com
Or join us in the upcoming MWS Partners Meet on 2nd Feb 2013. Details below: Date: 2nd Feb 2013 Venue: Inspired Learning Centre (Map) Time: 2pm – 5pm Topic: MWS Partners Meet (Moving Forward as a True Professional)


Comments